Wednesday, April 23, 2014

Sugar Rush #2: Banana Pancakes


I am not a morning person. Not even a little bit. I often wish that were a morning person. What at beautiful concept... to wake up with the sun, go for a run, get the day started early. But alas, if I'm up before 9:30 am, it has to be for something HUGE.

Every now and again, I am up early enough to be deemed acceptable by most of society. When such an earth-moving event happens, I need a breakfast that is just as earth-moving. But most of all, it needs to be easy as heck to make because there's no way I'm fully conscious at that time.

 THANK THE BREAKFAST GODS FOR BANANAS AND EGGS! When I'm really in a hurry, I'll just grab a banana and run. If I'm flat out lazy, I'll fry up an egg. But not too long ago, I had an epiphany and decided to combine the two things. And thus became banana pancakes. I am...so happy. 

You should get happy too! It really is as easy as you'll read below. It's also a great gluten/dairy/wheat-free breakfast option, since so many people are following those diets nowadays. Plus, it's absolutely filling and tastes amazing. Try it out next time you're in a rush! Or just because. I won't tell you how to live your life. Happy eating!


So here's the low-down:
Banana Pancakes
2 large eggs
1 ripe banana (mashed)
Optional: 1/4 tsp cinnamon and/or 1/4 tsp baking soda (fluffier pancakes)

1. Heat up skillet/pan on medium heat.
2. Beat eggs and mix with mashed banana.
3. Spray your skillet/pan with cooking spray. Pour a little less than 1/4 cup of batter onto heated surface.
4. When the edges look dry (about 2-3 minutes), flip your pancake! Cook for an additional 2 or so minutes until fully cooked.
5. Repeat until all the batter is used up!

Add toppings if you want too! Sliced strawberries, powdered sugar, greek yogurt (my preference), chocolate chips, whipped cream etc.


Have you ever had Vietnamese cinnamon before? It's sweeter and spicier than usual. My favorite!

Why is the first pancake always such a failure?
Much better!
Chocolate chips are always a great addition. 
Such a happy pancake!


Wednesday, April 16, 2014

Sugar Rush #1: Matzah Caramel Crunch

Thus begins a brand new series! Even though I didn't have time to make a video, I still wanted to share a delicious recipe with everyone. With Sugar Rush, the recipes may not come with a full on tutorial, but that doesn't mean it won't still have that easy peasy, Short and Sweet touch. Moving on to what I have in store today!


Passover just started Monday evening, and that got me to thinking of matzah. Although I'm not Jewish, I have sat at quite a few Seder tables. The table is always set impeccably, the dining room overflowing with food and wine. And no Passover would be complete without a few raucous rounds of "Dayenu" and a viewing of The Prince of Egypt. It's a great holiday in my opinion, even if it does take about fifteen steps to get through dinner. But if there's one thing that's taken especially seriously, it's the matzo.

What's matzah (matzo, matzoh, matza)? It's a thin, unleavened bread. It's pretty much like crackers. Now, everyone has heard of matzah balls. Man, do I miss matzah balls... But what about matzah for dessert? If you're going to try anything this Passover, try this: Matzo Caramel Crunch. Goodness gracious. This stuff is like crack. It turns the bland matzo that tastes almost as good as the cardboard box it comes in into something addicting and irresistible.

Crunchy. Sweet. Chewy. Hint of saltiness. Caramel-y. Chocolatey. Oh, and did I mention that it's totally customizable? If you're a sea salt fiend like me, sprinkle some of that on top of the chocolate while it's still melty. Or throw some toasted almonds on there. Or some coconut flakes. Whatever you want!
Keep it all Kosher, of course ;)


Matzah Caramel Crunch
4-6 pieces of unsalted, unflavored Matzo
1 cup butter
1 cup packed brown sugar
1 cup chocolate chips or chopped chocolate
Toppings (optional)

1. Preheat oven to 375 degrees.
2. Line large cookie sheet with foil. Spray with cooking spray, then place parchment paper on top of foil. It's gonna get sticky up in here.
3. Place matzo pieces corner to corner on tray. Break off smaller pieces so that every surface is covered.
4. In heavy bottomed saucepan, cook butter and brown sugar on medium heat until boiling (about 3 minutes). Stir, stir, stir.
5. Continue boiling for additional 3 minutes. Don't stop stirring!
6. Pour caramel over matzo until completely covered.
7. Place tray in oven and immediately reduce oven temperature to 350 degrees. If it looks like it's browning too quickly, reduce temperature to 325 degrees. Bake for 15 minutes.
8. Remove from oven and sprinkle chocolate chips/pieces on top. Let the residual heat melt the chocolate. Spread evenly.
9. While still warm, break up the crunch into desired pieces. Place tray in freezer to set crunch completely.
10. Remove crunch pieces from tray. Store in airtight containers, or just watch as they disappear!


Tuesday, April 15, 2014

Short & Sweet #5: ICE CREAM MUFFINS


I always hear the phrase: "If it's too good to be true, it probably is."

That's exactly what I thought when I came across a recipe that claimed that you can make muffins out of just a pint of ice cream and flour. Preposterous! Unheard of! I simply can't believe it! Seriously though, I'm all about easy, time-saving recipes. But this one had me feeling skeptical. I suppose the logic behind its potential success makes sense. Ice cream does have a lot of ingredients that go into muffin batter (eggs, sugar, milk, etc). BUT SERIOUSLY? Could it really be that easy? I had to try this witchcraft for myself. And you know what? It actually worked!


 Are these the best muffins I've ever had? No.

 As a seasoned baker, could I whip up something better from scratch? Probably.

 Is this a great quick-fix, last minute way to make yummy muffins? Abso-tiddly-lutely.

So with that being said, I want all of you out there to try it out as well! Like I say in my video, the possibilities are endless with this type of recipe. Although the original post calls for plain vanilla ice cream, I found that Chunky Monkey worked out magnificently. What should be next? Cookie dough? Mint chocolate chip? Mango? Oooh...I am positively swimming in ideas right now! Let me know if this works for you too and what flavor of ice cream you would choose!


Ice Cream Muffins
1 pint of ice cream (flavor of your choosing)
2 cups self rising flour
OR
2 cups all-purpose flour plus 3 tsp baking powder

1. Soften ice cream ahead of time for about one to two hours until workable consistency.
2. Preheat oven to 425 degrees.
4. Grease muffin tin or line with paper cups.
3. In large mixing bowl, fold softened ice cream together with flour (and baking powder if using all-purpose flour).
4. Once batter is well-incorporated, portion out into muffin tin.
5. Bake for 20-25 minutes.
6. Remove from oven and let muffins cool on rack.
7. Marvel at the magic that just happened in your kitchen, then ENJOY!


Original article here

Friday, March 8, 2013

Short & Sweet #4: 3 INGREDIENT PEANUT BUTTER COOKIES


I know what you're thinking right now... "Did I read that title correctly? Surely, making cookies can't be that simple!" Well, buck up and pay attention, my friend! And don't call me "Shirley". Because I ain't foolin' around here! Who knew that making cookies could require so little work and resources? It's usually a bit of a pain, I realize that. Just for a simple chocolate chip cookie recipe, you have to cream butter and sugar to the right consistency. You have to make sure  your ratio between liquid and dry ingredients is correct to avoid disaster in the oven. There are so many things that can go wrong when making cookies from scratch. But fear not, weary bakers! This recipe is (literally) as easy as 1...2...3!

And the result? How do I even begin to describe these scrumptious morsels?
Rich yet fluffy.
Crispy yet chewy.
Complex yet simple.
The luscious flavors of peanut buttery goodness will fill your mouth, causing an explosion of ecstasy you never thought could be achieved by a mere cookie. And just when you think it is over, you will find yourself reaching for another. And another. Until you remember nothing of the life you led before you entered the heavenly peanut butter palace built by these cookies.

...too dramatic?

Well, these sweet treats garner quite a reaction from my taste buds. I just can't help it! Try these for yourself! And watch my baking vloggity to see exactly how I react, if you still can't decide if you want to make some or not :)


3 Ingredient Peanut Butter Cookies
1 Cup of sugar
1 Cup of peanut butter
1 Egg

1. Preheat oven to 350 degrees.
2.  Measure out ingredients and combine in a mixing bowl. Mix until all ingredients are well-incorporated.
3. Scoop dough out by the Tablespoon-ful onto a lined baking sheet.
4. Flatten each dough ball slightly with a fork.
5. Bake for 8-10 minutes.
6. Remove from oven and let sit for a few minutes on tray. Move cookies onto a cooling rack.
7. STUFF YOUR FACE.


CAN'T GET ENOUGH COOKIES OMNOMNOMNOM! 

Friday, February 8, 2013

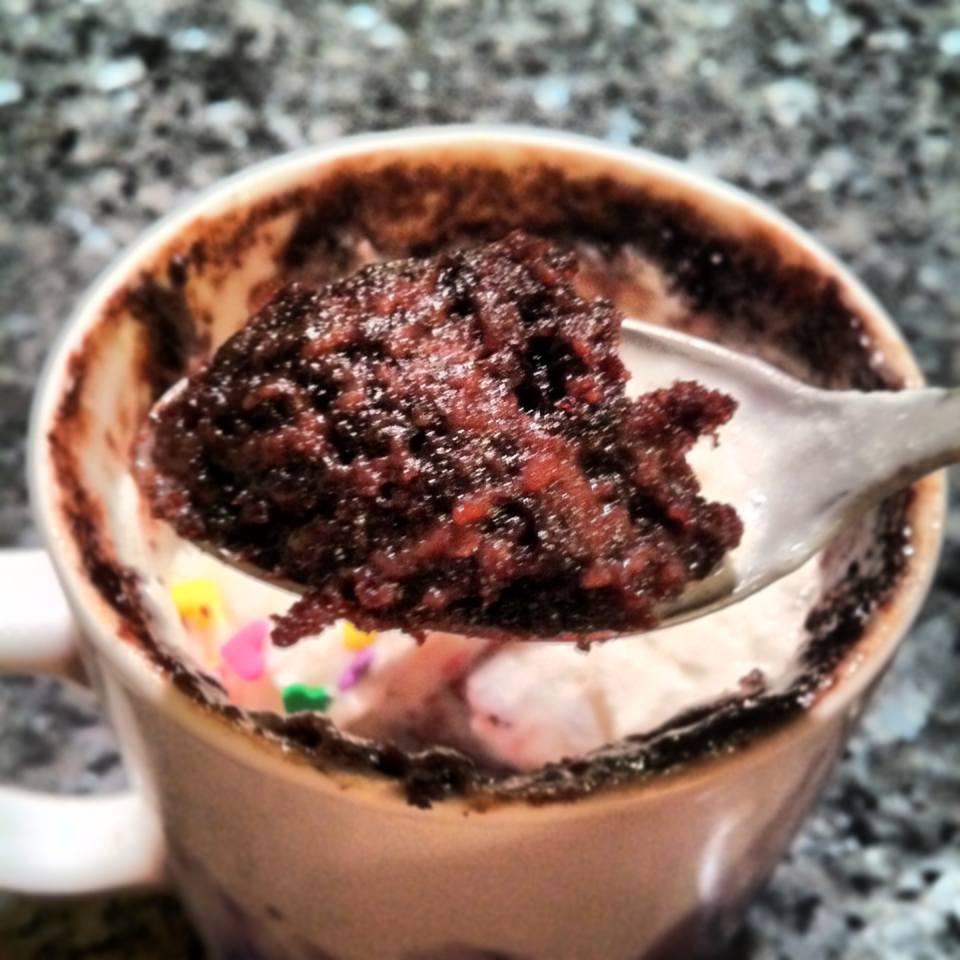
Short & Sweet #3: NUTELLA MUG CAKE


Yeah, yeah. I completely forgot to post a recipe last week. No excuses here! But hopefully this will make up for my absence :)

This is my special single serving Valentine's Day recipe for everyone! Why? Because I personally don't have a Valentine to share this day with. And I know that I'm not the only one. But this needs not be a reason to despair. Here are some pros for why it's better to be alone on February 14th:

  • You don't have to share your cake.
  • Dinner and a movie? There's no need to argue about what to eat and watch.
  • You don't have to put on a bra or change out of your PJ's to get dressed up to go out.
  • Presents? All for yourself!
  • You don't have to feel the pressure of planning something elaborate or romantic for your significant other. 
  • No one will be there to judge you while you cry over rom-coms.
  • You don't have to share your cake.


I think I've made my point... In all seriousness, this really is the perfect dessert to have on this holiday. It's chocolatey and extremely rich. If you do decide to share this treat with that special someone, it's also easy, fun to prepare together, and definitely sure to impress. Nothing says "Bow-chicka-wow-wow" like moist things and chocolate. Watch my video for more details! :)


Nutella Mug Cake
4 Tbsp all purpose flour
4 Tbsp sugar
1/4 tsp baking soda
1 egg
3 Tbsp Nutella
3 Tbsp unsweetened cocoa powder
3 Tbsp vegetable oil
3 Tbsp milk
(optional) A dash of salt
Toppings of your choice: whipped cream, chocolate shavings, raspberries, strawberries, etc.

1. Combine all ingredients (other than toppings..duh) in a VERY large mug.
2. Mix the ingredients thoroughly with a fork or small whisk. Mix until combined into a smooth, thick batter. At this point, if you'd like to make more than one serving, pour half of the prepared batter into a separate mug.
3. Microwave for 1 1/2 to 3 minutes. Start with 1 1/2 minutes, then continue at 30 second intervals if needed. Make sure you keep an eye on the mug! If the batter starts to overflow, stop the microwave, let the cake settle, then continue heating to desired consistency.
4. Remove cake from the microwave and let cool slightly.
5. Top with whatever you wish! Serve warm.


Original article on Buzzfeed

Friday, January 25, 2013

Short & Sweet #2: EASY CHEESE BUNS


I won't lie. Even though I'm very well versed in the making of bread buns and rolls, I still don't want to put in that much work sometimes. There's adding yeast, and waiting for it to rise, and kneading, and just so much time waiting around for magic baking fairies to turn your dough into something workable. Peeta Mellark may enjoy doing all that work to get his mind off of the Hunger Games (and to please his dearest wife-to-be, Katniss), but I'm not swimming in trauma enough to take that much time making cheese buns.

Solution? Cheese biscuits disguised as cheese buns! This recipe uses pancake mix to get a head start. The rest is pretty easy as well. These little mini cheese bites are perfect for your next Hunger Games themed party or as a take-along snack at the Catching Fire midnight showing. No wonder Katniss craves these things so much. Rich, cheesy, salty goodness. They'll be gone and in your tummy before you can say, "May the odds be EVER in your favor!"


Easy Cheese Buns
1 1/2 cups pancake mix
2 cups shredded cheddar cheese
3/4 cup buttermilk
1/2 Tbsp salt
1/4 tsp vanilla
(optional) 1 Tbsp dried parsley flakes

1. Preheat oven to 425 degrees.
2. Spray your mini muffin tin with cooking spray.
3. Combine all ingredients into mixing bowl.
4. Mix until everything is well-combined and mixture is wet.
5. Fill mini tins to 3/4 full.
6. Bake in oven for 12-15 minutes.
7. Remove from tins and cool on rack.
8. Let the hunger games begin!


Friday, January 18, 2013

Short & Sweet #1: DEATH BY OREO CUPCAKES


You know, not all of us are aspiring to be executive pastry chefs at a fancy boutique hotel in Hollywood. Not everyone uses creme fraiche or Pate a Choux or creme anglaise in normal day to day conversations. However, most of us do enjoy a sweet treat now and again. Dessert is, in my opinion, the best part of any meal.

But how can you bake up something sweet, delicious, and homemade without the hassle? Sometimes a one layer Funfetti cake from Betty Crocker with canned frosting doesn't quite cut it. But baking a double batch of cupcakes from scratch is just far too daunting and time consuming.

Solution? Combine your two options! Start with a cake mix, tweak it a little bit, and top it all off with a delicious frosting from scratch. This Death by Oreos Cupakes recipe is just the ticket if you'd like to impress your friends without worrying about suddenly turning into a fancy pastry chef for a day. Let me show you how it's done! :)


If you'd like to join me on this yummilicious journey one day, the recipe is as follows:

Death by Oreo Cupcakes
1 box devil's food cake mix
Ingredients as per box instructions
1 whole package of Oreos
1/2 cup or 1 stick butter (room temperature)
8 oz or 1 package cream cheese (room temperature)
2 to 3 cups powdered sugar

Cupcakes
1. Preheat oven to temperature instructed on cake box for 24 cupcakes.
2. Place cupcake liners in cupcake tin. Put one Oreo cookie at the bottom of each liner.
3. Combine ingredients for devil's food cake mix. (On this step, feel free to add more Oreo crumbs or chocolate chips into the batter if you're feeling especially adventurous)
4. Pour batter into cupcake tin.
5. Bake cupcakes according to box instructions.
6. Once finished, remove from oven. Remove cupcakes from tin and let cool on racks (on racks on racks).

Frosting
1. Crush remaining Oreo cookies into small crumbs with food processor or in a plastic bag. Set aside.
2. Cream butter and cream cheese until smooth with electric mixer.
3. Slowly add powdered sugar and mix until desired stiffness. Add crushed Oreo crumbs and mix well.
4. Top your cooled cupcakes!
5. For funsies, you can also add mini Oreos on top of your frosting, or sprinkles, or chocolate syrup, or whatever your heart desires! Have fun with it!